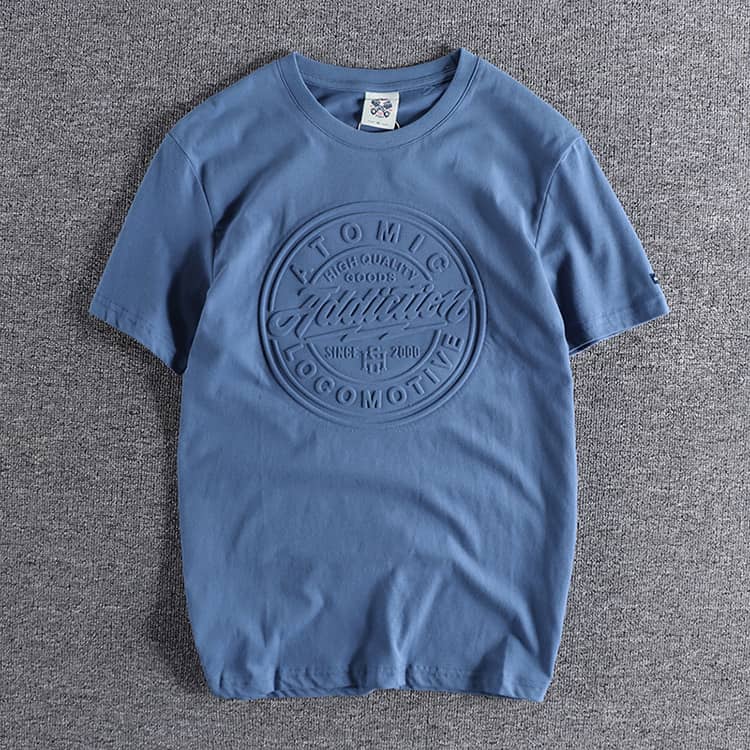
Embossing
Embossing in garment printing is a process which creates an impression on the fabric’s surface. It involves applying pressure to the garment and leaving behind a raised or depressed image or pattern—also known as blind printing or relief printing. There are two kinds of embossing: blind embossing and foil. Blind embossing produces a raised or depressed mark that is the same as the garment itself, while foil adds a metallic or colored foil layer to these areas.
Embossing is a longer printing process and has a minimum of 50pcs. We have to create a metal stencil for this method, so some designs are more suitable than others. Feel free to email us to learn more.
Embossing
Embossing is a technique used to create raised or three-dimensional designs on various materials, such as paper, leather, or metal. It adds texture and visual interest to the surface. Here are the general steps involved in embossing:
-
Prepare the materials: Gather the materials you want to emboss, such as paper, cardstock, or any other suitable material. Ensure that the surface is clean and smooth, free from any dirt, oil, or debris.
-
Design and mark: Decide on the design or pattern you want to emboss. You can either draw the design directly on the material or use pre-made stencils or embossing folders. Use a pencil or embossing pen to trace the design onto the surface. Applying light pressure will leave a visible mark without damaging the material.
-
Embossing powder: Apply embossing ink or embossing adhesive to the marked area. Embossing ink is specially formulated to stay wet for a longer period, allowing the embossing powder to adhere to it. Make sure to cover the entire design area evenly with the ink or adhesive.
-
Apply embossing powder: While the ink or adhesive is still wet, sprinkle embossing powder over the design, completely covering the marked area. The powder will stick to the adhesive, creating a raised effect. Gently tap or shake off any excess powder from the surface. The embossing powder will cling only to the areas with ink or adhesive.
-
Heat embossing: Use a heat tool or heat embossing machine to melt the embossing powder. Hold the heat tool a few inches away from the surface and direct the heat towards the embossing powder. Move the tool around to evenly distribute the heat and prevent overheating or scorching. The heat will cause the powder to melt and form a raised, glossy design.
-
Cooling and finishing: Allow the embossed design to cool and solidify for a few seconds. The embossing powder will harden as it cools, creating a permanent raised effect. Once cooled, gently touch the embossed area to ensure it is dry and no longer tacky.
-
Optional steps: If desired, you can further enhance the embossed design by adding additional colors or effects. For example, you can use embossing pens to apply colored embossing powder selectively, or you can apply ink or paint to the embossed design and then wipe off the excess for a distressed or antiqued look.
These steps provide a basic guideline for embossing. However, the specific techniques and materials may vary depending on the type of material being embossed and the desired effect. It’s always recommended to refer to the instructions provided by the manufacturer of the embossing supplies you are using.
Our Customers
24 Hour Online Support
Get a Quick Quote
